First prepare tools, a pair of scissors, a screwdriver, a roll of electric cloth, and a flat screwdriver (for tilting the center console)
Then start work.
1. Tilt the center console. If you don’t have a plastic screwdriver, use the prepared flat-blade screwdriver. When tilting, be careful not to scratch the center console. I won't talk about how to ask, there are many ways to forum. After the central control is tilted down, as shown below:
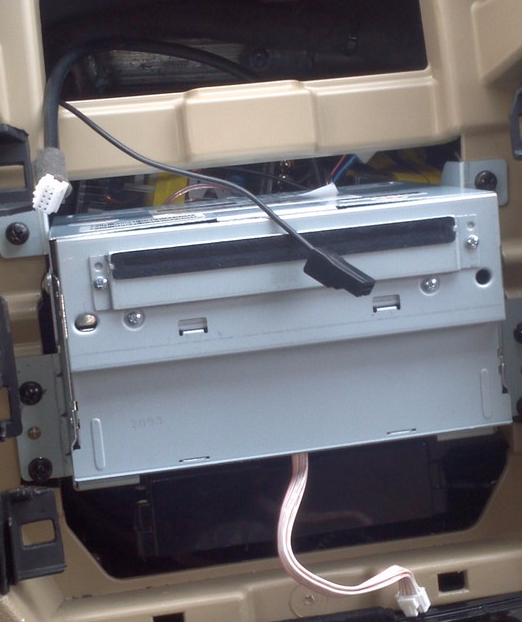
2. Remove the central control host, remove the 6 screws next to the host in the picture above, and the host can be taken out.
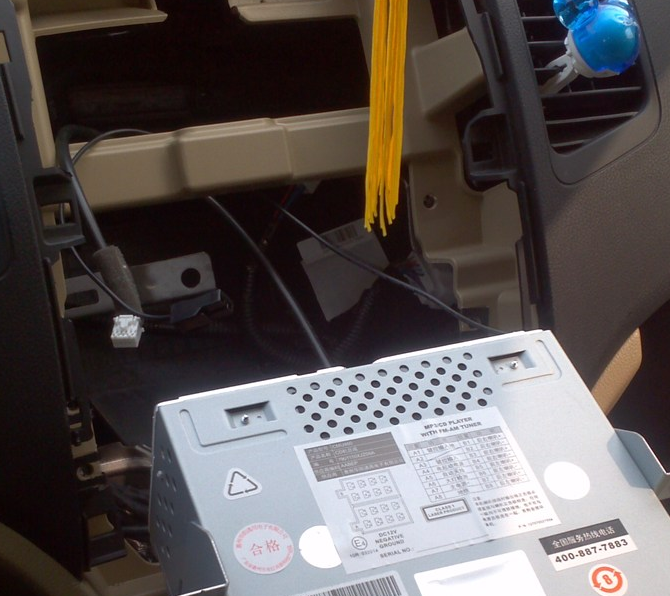
3. Unplug all the plugs on the back of the host, and then take out the host. The plug I found to connect to the stereo was a brown plug.
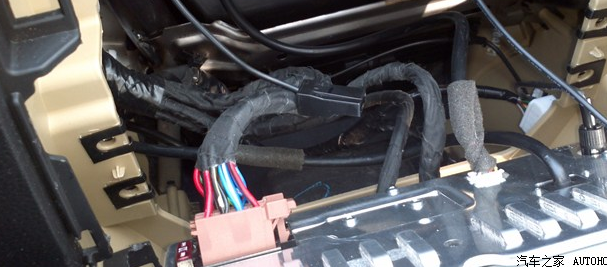
4. On the top of the brown plug, there are 8 jacks marked 1, 2, 3, 4, 5, 67, 8, of which the four positions 1, 2, 7, 8 need to be changed, and we need to change the line only 3 ,4,5,6 four positions. Corresponding to B1, B2, B3, B4, B5, B6, B7, B8 in the sticker on the host. (As shown in the picture: B represents that the plug is connected to the audio plug, and the 1,2,3,4, 5, 6, 7, 8 correspond to 1, 2, 3, 4, 5, 6, 7, and 8 on the plug.)
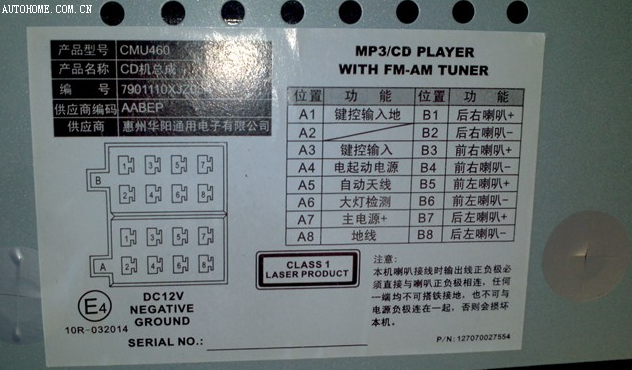
5. Start wiring, we only need to connect 8 wires out of 4 plugs (3, 4, 5, 6). (Note that the central control tweeter and the front door woofer are connected in parallel, that is, the front right speaker (B3, B4) is connected to the front right tweeter and woofer. Similarly, the front left speaker (B5, B6) The tweeter and woofer on the front left are connected. Pay attention to distinguish the positive and negative poles of the horn. B3 and B5 are positive and B4 and B6 are negative.) B3, B4, B5, B6 each have two wires, one thick wire And a thin thread. The thick wire is for the bass, and the thin wire is for the treble. It's easy to distinguish.
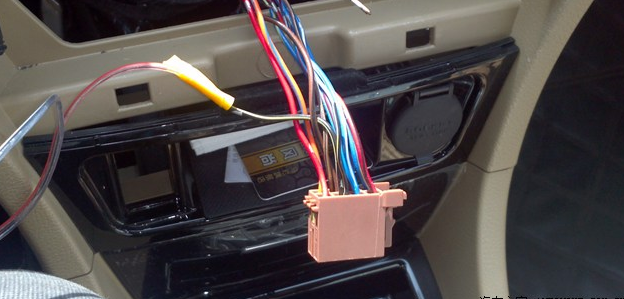
6. When wiring, follow the order, first cut the two thick wires on B3 and B4, and connect the two wires (connected to the plug section) to two extension wires respectively, and lead them to the input on the frequency divider. On the piece, pay attention to distinguish the positive and negative poles, connect the positive to the positive, and the negative to the negative.
Then, connect the thick wires (connected to the speaker end) of B3 and B4 to the two positive and negative poles of the bass of the frequency divider in turn, and pay attention to distinguish the positive and negative poles.
In the same way, the two thick wires of B5 and B6 (the plug section) are connected to the other divider. (Connect the wire end of the speaker) to the two positive and negative poles of the bass of the other crossover. (Note that the four thin wires on B3, B4, B5, and B6 should be cut short first)
Tip: When wiring, it is best to cut one and connect one to prevent wrong wiring.
7. After connecting the bass cable, in the same way, cut the thin wires on B3, B4, B5, and B6 in turn, and connect the thin wires (connected to the speaker end) to the treble positive of the crossover according to the way of connecting the thick wires. Negative electrode î·¥.
(When connecting the tweeter, pay attention that the four thin wires of the plug section need to be connected. After cutting, they should be wrapped directly with an electric cloth to prevent leakage and signal interference.)
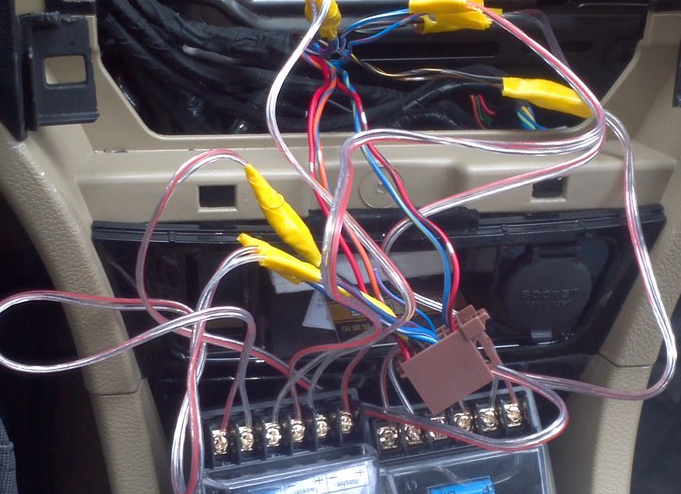
8. The installation position of the frequency divider is installed behind the central control display. There is a large area enough to put the frequency divider. Use 3M double-sided tape to fix it, if not, you can also use other methods to fix it inside, I fixed it with electric cloth
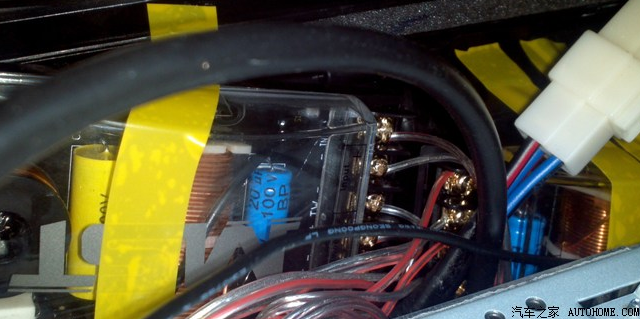
9. Finish work and plug in all the plugs behind the host. It can’t be plugged in wrongly, except that the two plugs where the speaker is connected are the same, and everything else is different.
The speaker plug (brown) is on the top, and the audio control plug (black) is on the bottom.
Switch Series,Usb Toggle Switch,Double Toggle Switch,Push Button Toggle Switch
Lishui Trimone Electrical Technology Co., Ltd , https://www.3gracegfci.com